
Making A Princess Mononoke Cosplay – The Base: Dress and Apron
Princess Mononoke. Her stock costume needs surprisingly little sewing to complete. Which is great, because I have a love/hate relationship with the sewing machine…
Despite the overall lack of sewing compared to most cosplays, this post has a lot of stitches and pins in it. Because today we’re focusing on the dress and apron.
Random note: I decided to make my Mononoke look more weathered, as if she had come out of a couple fights. She lives in the forest after all. If nothing else, thorns will catch on her clothes. So, many of my decisions on how to make her outfit had that in mind.
Like leaving some things un-sewn.
The base of her outfit is a dark dress and a light “apron.” 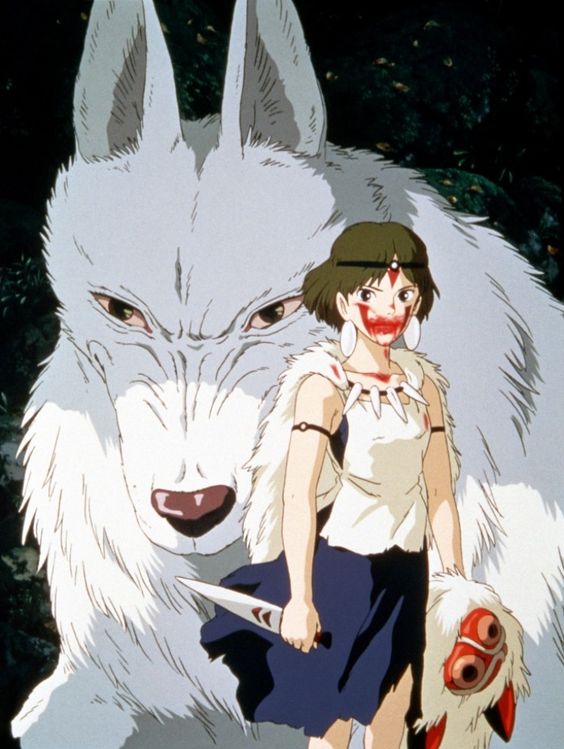
First, her dress.
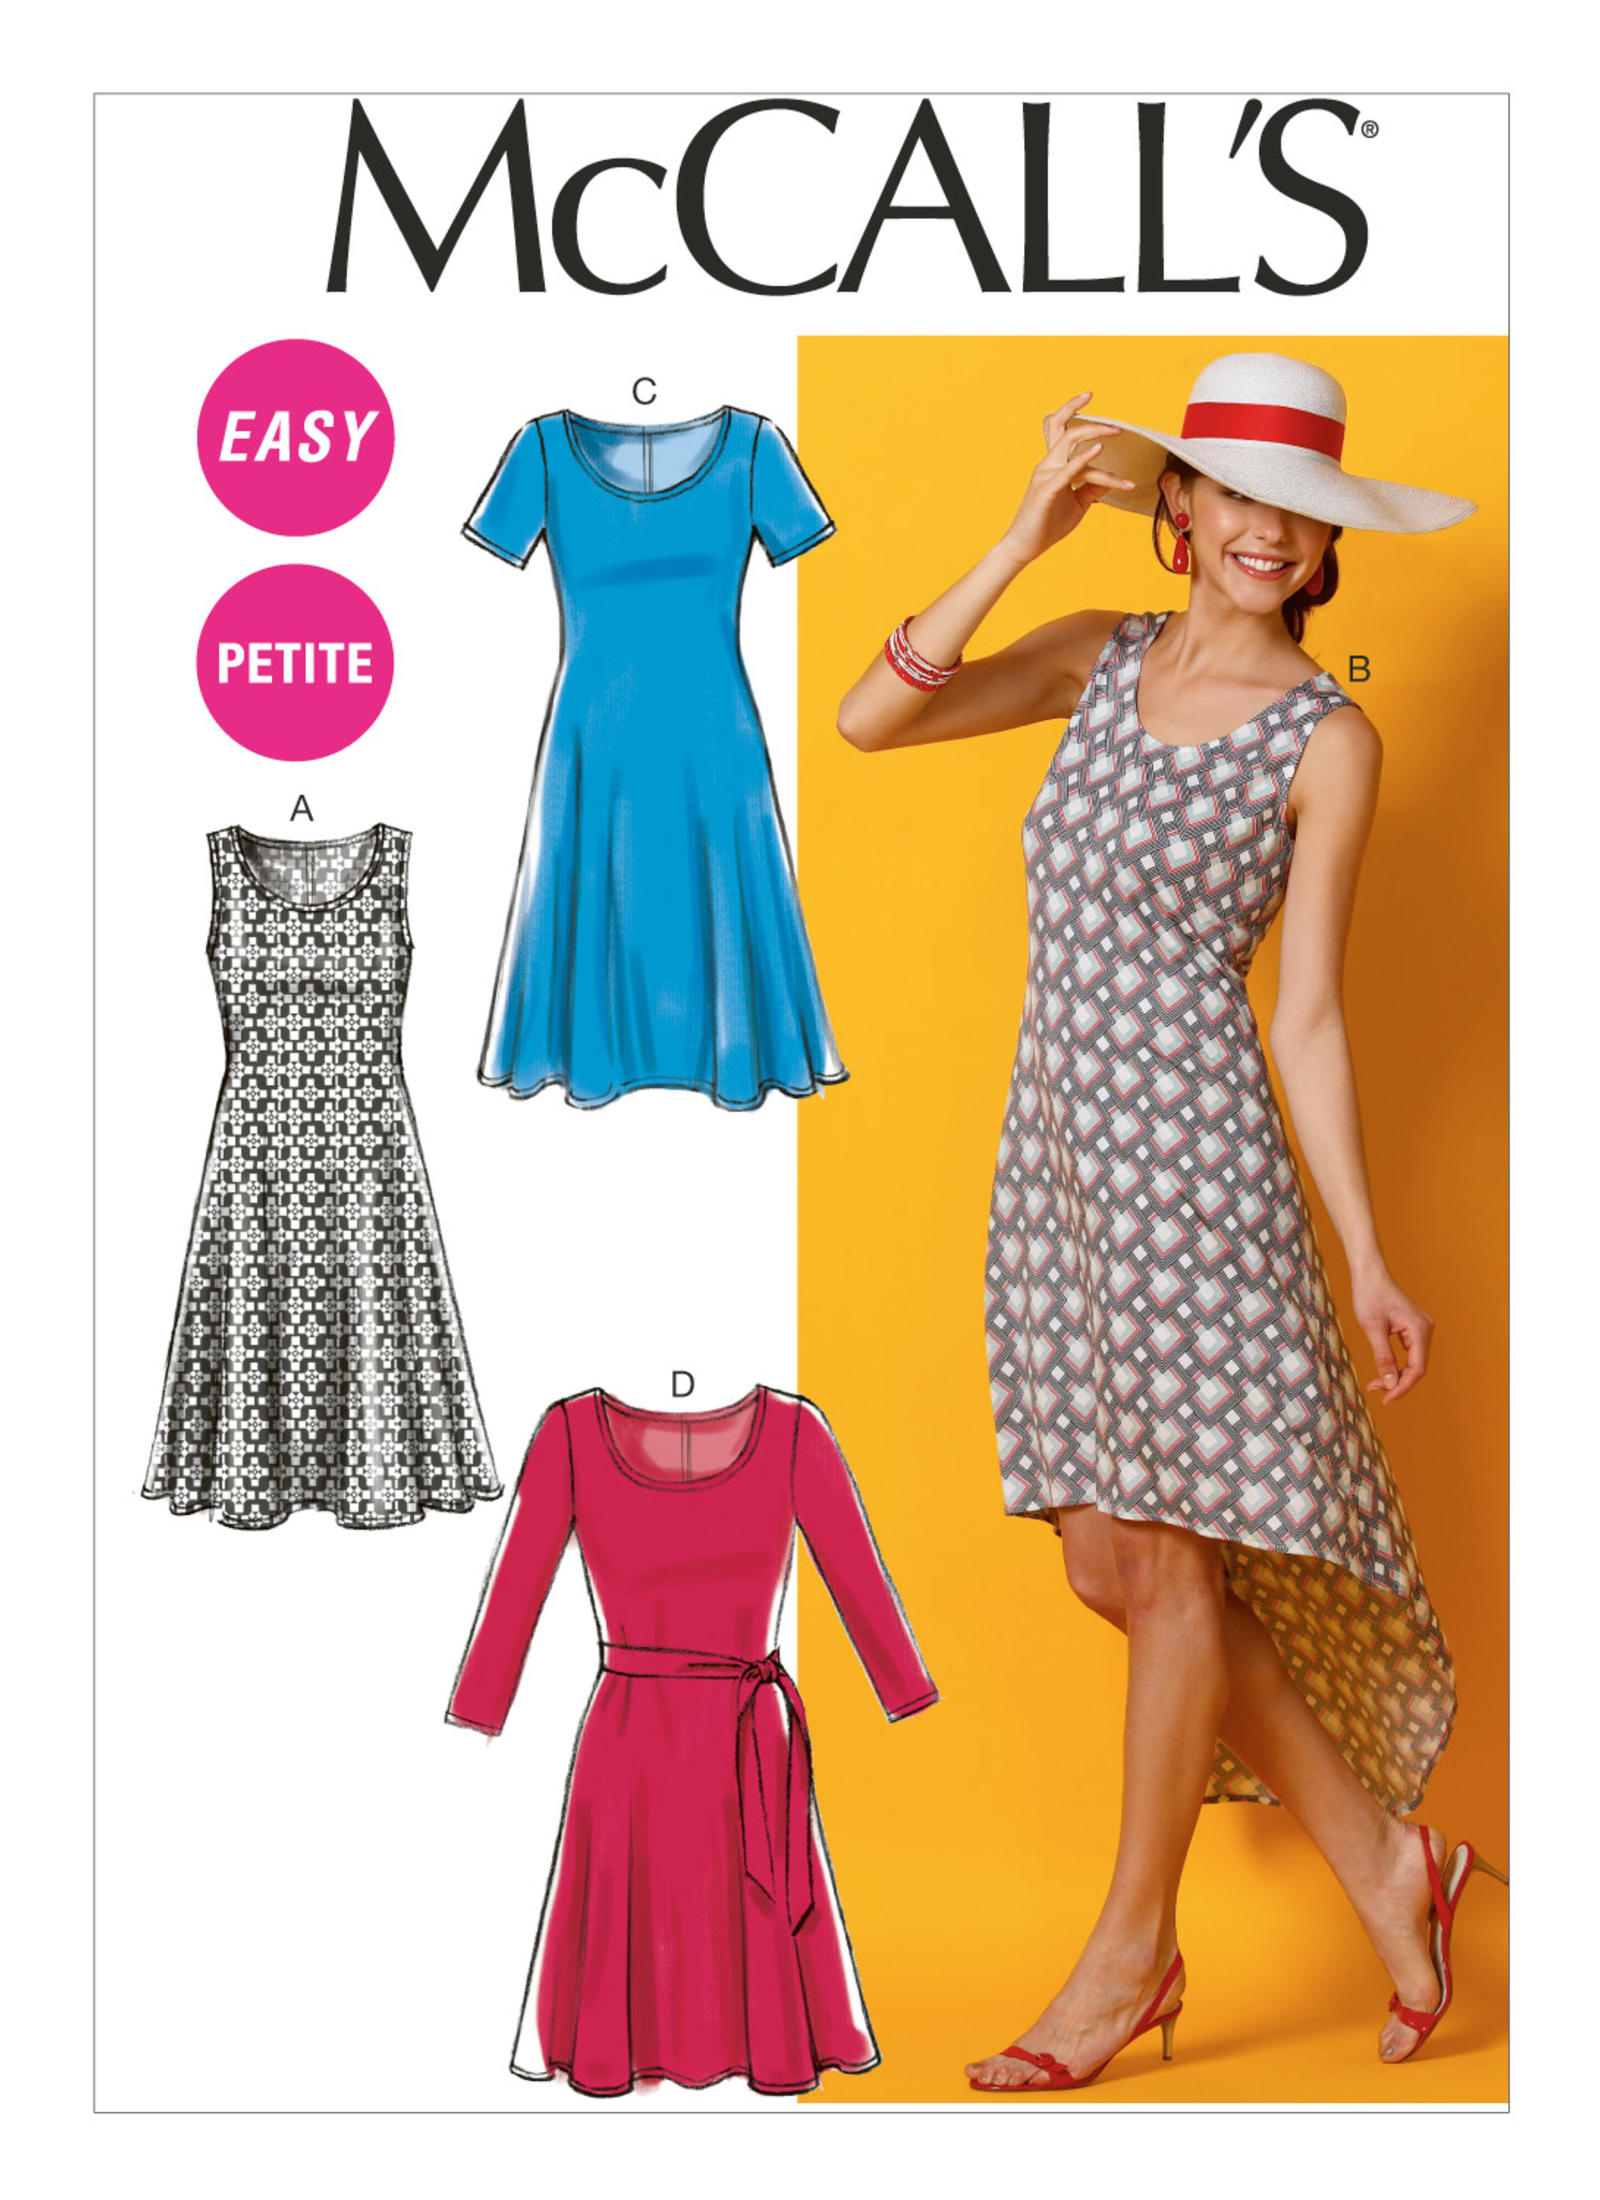
I’d call it a very dark blue. After some research online, I saw that some cosplayers used McCalls pattern M6957 for the dress. Looking at the pattern, I agreed: it was almost perfect for Mononoke. (Does anyone care that I’m calling her Mononoke and not San or Sama?) The only real alteration needed was to square the neckline and thin the straps.
I also looked around to see what type of fabric others used, and if they had photos of how it turned out.
I decided on a jersey knit. Because of the significant stretch to this fabric, sewing becomes more challenging.
After taking my measurements and looking at the numbers on the pattern (which I found at Jo-Ann’s), I purchased 1 1/2 yards of fabric.
Tip 1: If you can afford it, you always want to get a little more fabric than you think you need. Depending on how you cut it out, and if you make any mistakes, it can be a lifesaver to have extra on hand.
Tip 2: If you purchase fabric at Jo-Anne’s, make sure you receive their coupons by mail, text, or phone app. They always have some sort of coupon, and if you can wait, a 50-70% off one will pop up. Lots of deals. When you’re purchasing fabric, coupons save your budget big time.
 Proof: I believe I spent $8 on Princess Mononoke’s dress fabric and $6 on the apron fabric.
Tip 3: Don’t shop for fabric in the “costume fabrics” section. Unless you want sparkly, shiny things that look…well…ridiculous. But if you have a ridiculous character, it’s perfect. ;)
Tip 4: Take photos of the fabric you are considering in different lighting, with and without flash. When you wear a costume somewhere, people are likely going to take photos. You don’t want them to show serious flashback and glare. Not only does it make a bad photo, but it can make your costume look “fake.” (Remember the horrid costume fabrics? Yes, like that.)
I cut out the dress using the pattern, sewed the side and back seams, then tried it on.
Tip 5: Always try your costume on while you’re making it. After every step. Do it.
It was too large. It kind of swam on me. The funny thing about patterns; most of them only go down to a size four (some only go down to a six). For a proverbial bean pole, that ain’t gunna cut it. I had to take in the seams several times before it fit well enough that I wasn’t afraid it was going to have…issues.
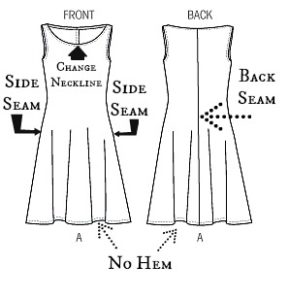
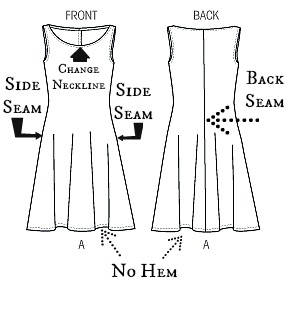
I left the bottom hem un-sewn, because I was going to make that nice and ragged later.
Then came the hard part. The neckline and arm holes. *shudder*
This took me far longer than the side seams. I pinned, tried on, cut, re-pinned, and re-tried on…*catches breath*…at least seven times.
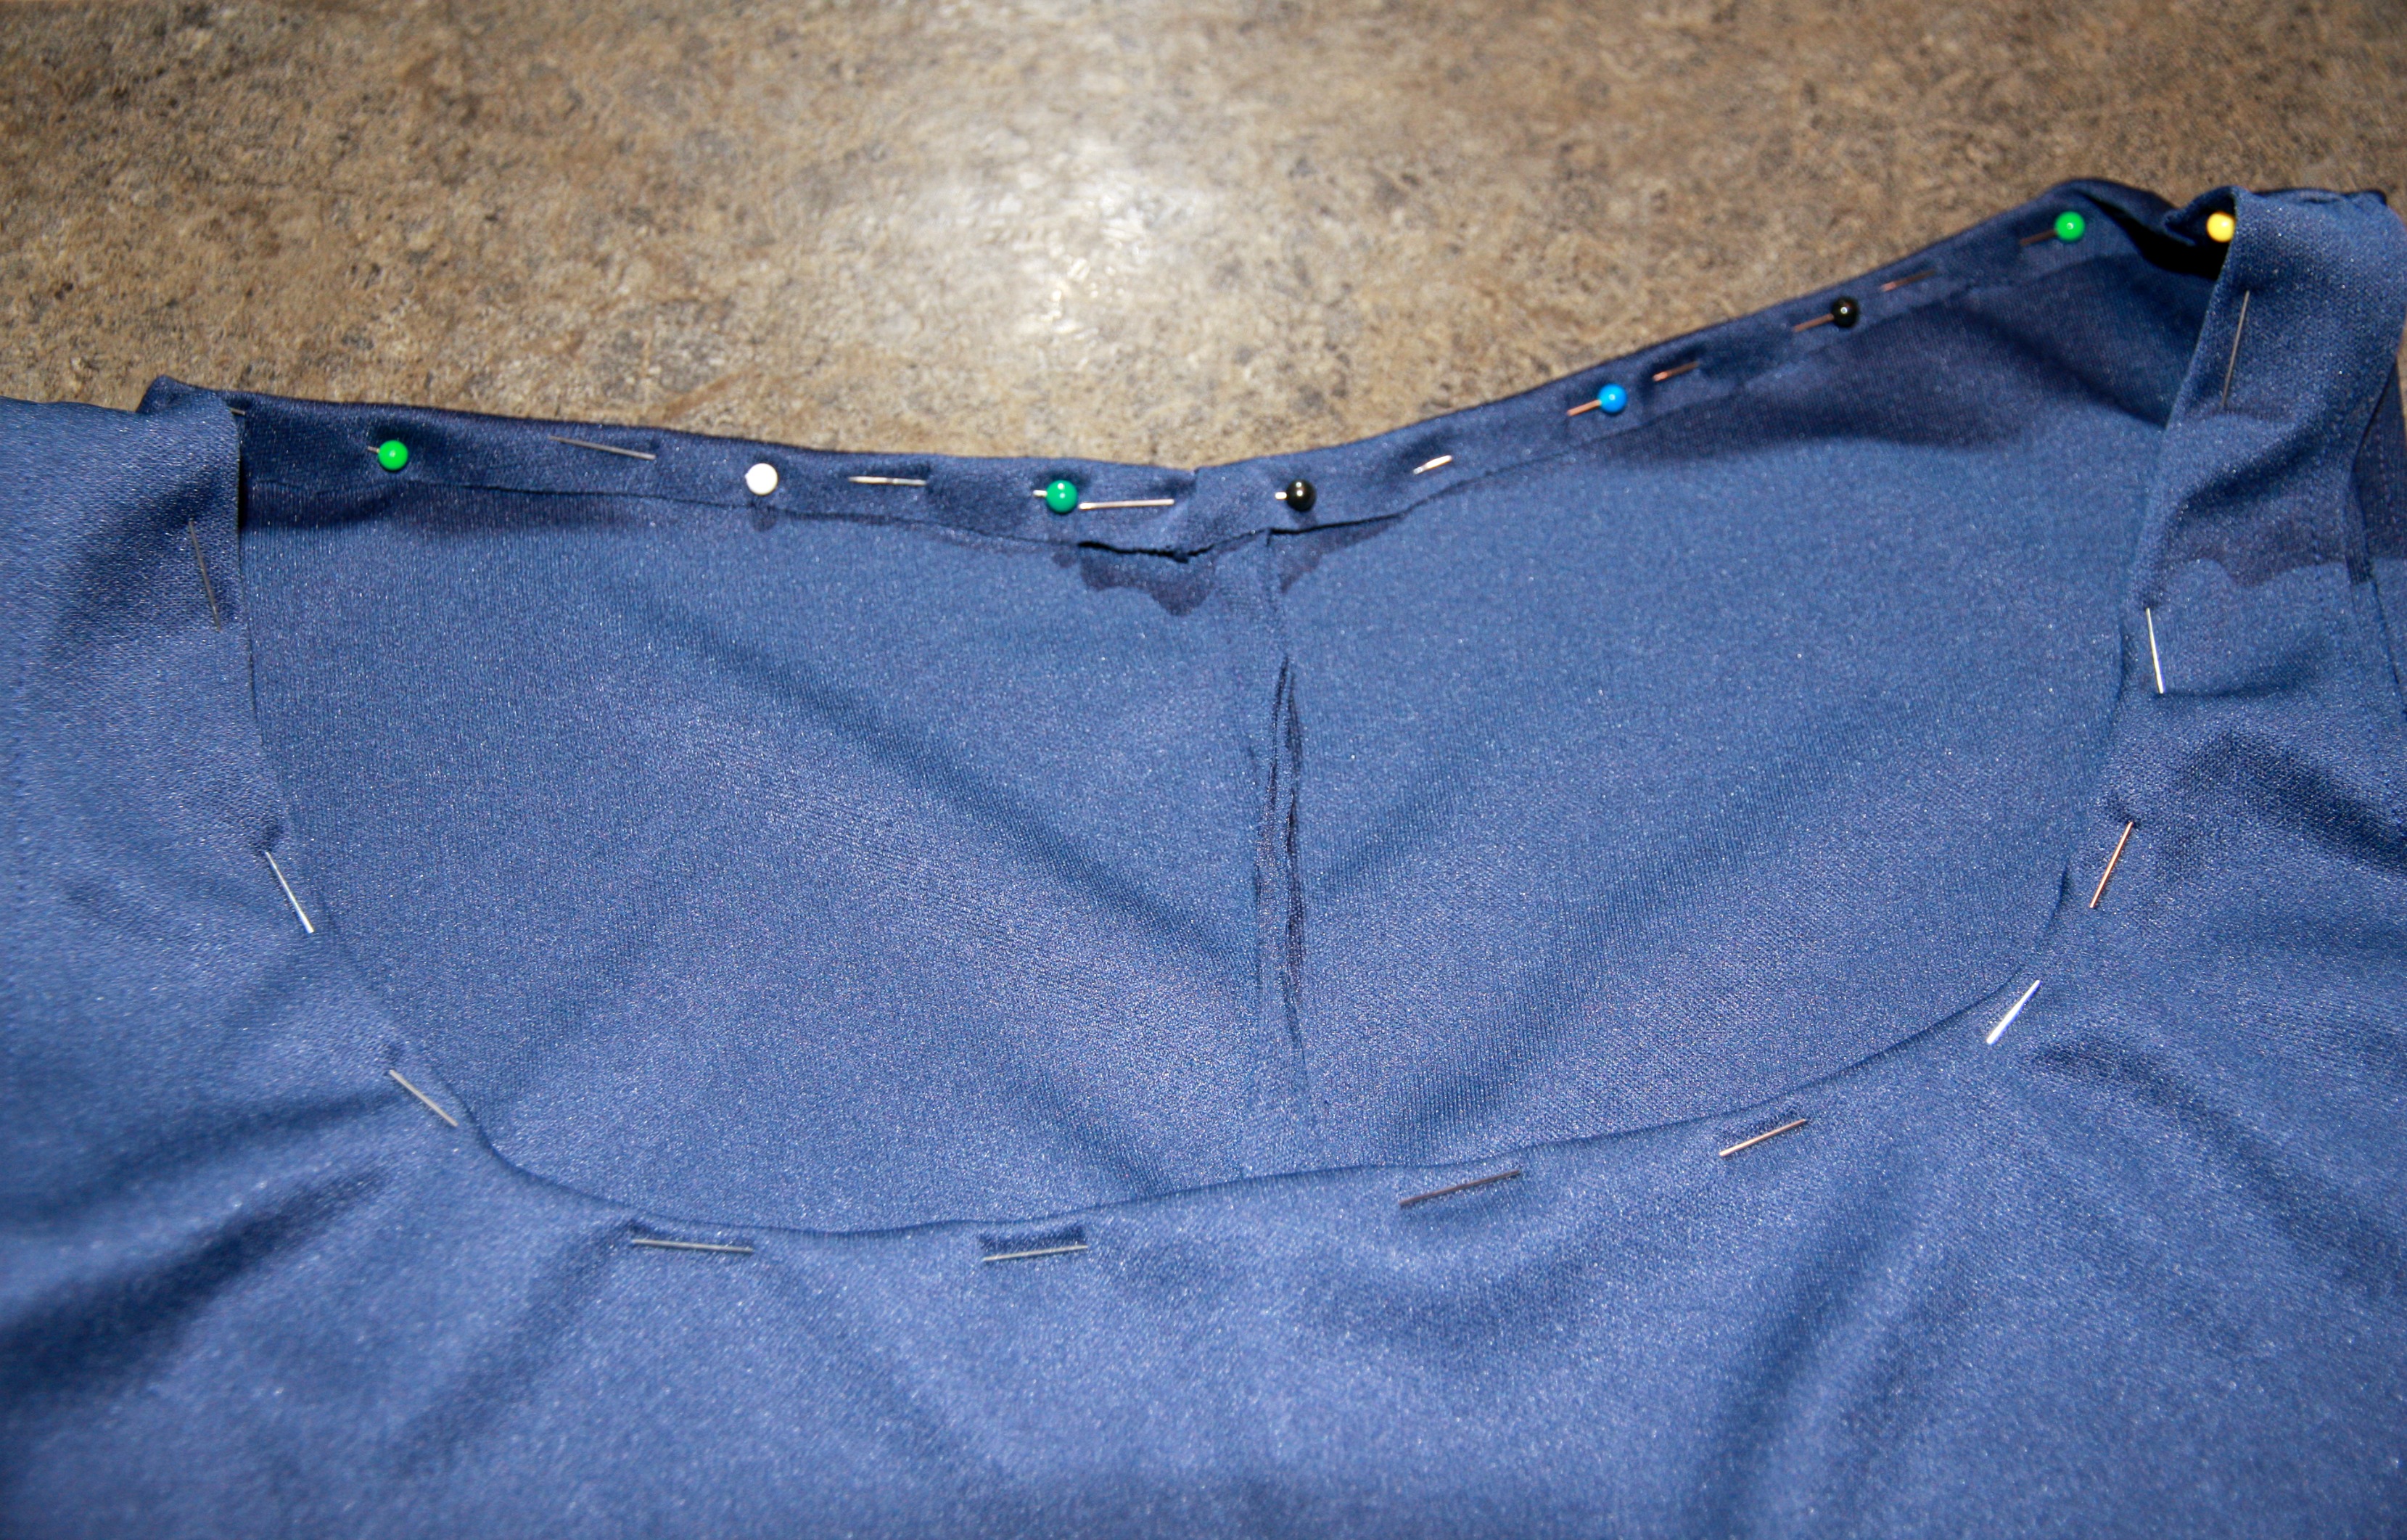
The neckline started out far too high (It needs to be invisible behind Mononoke’s apron) and too gently sloped, which meant the straps were also too wide to hide.
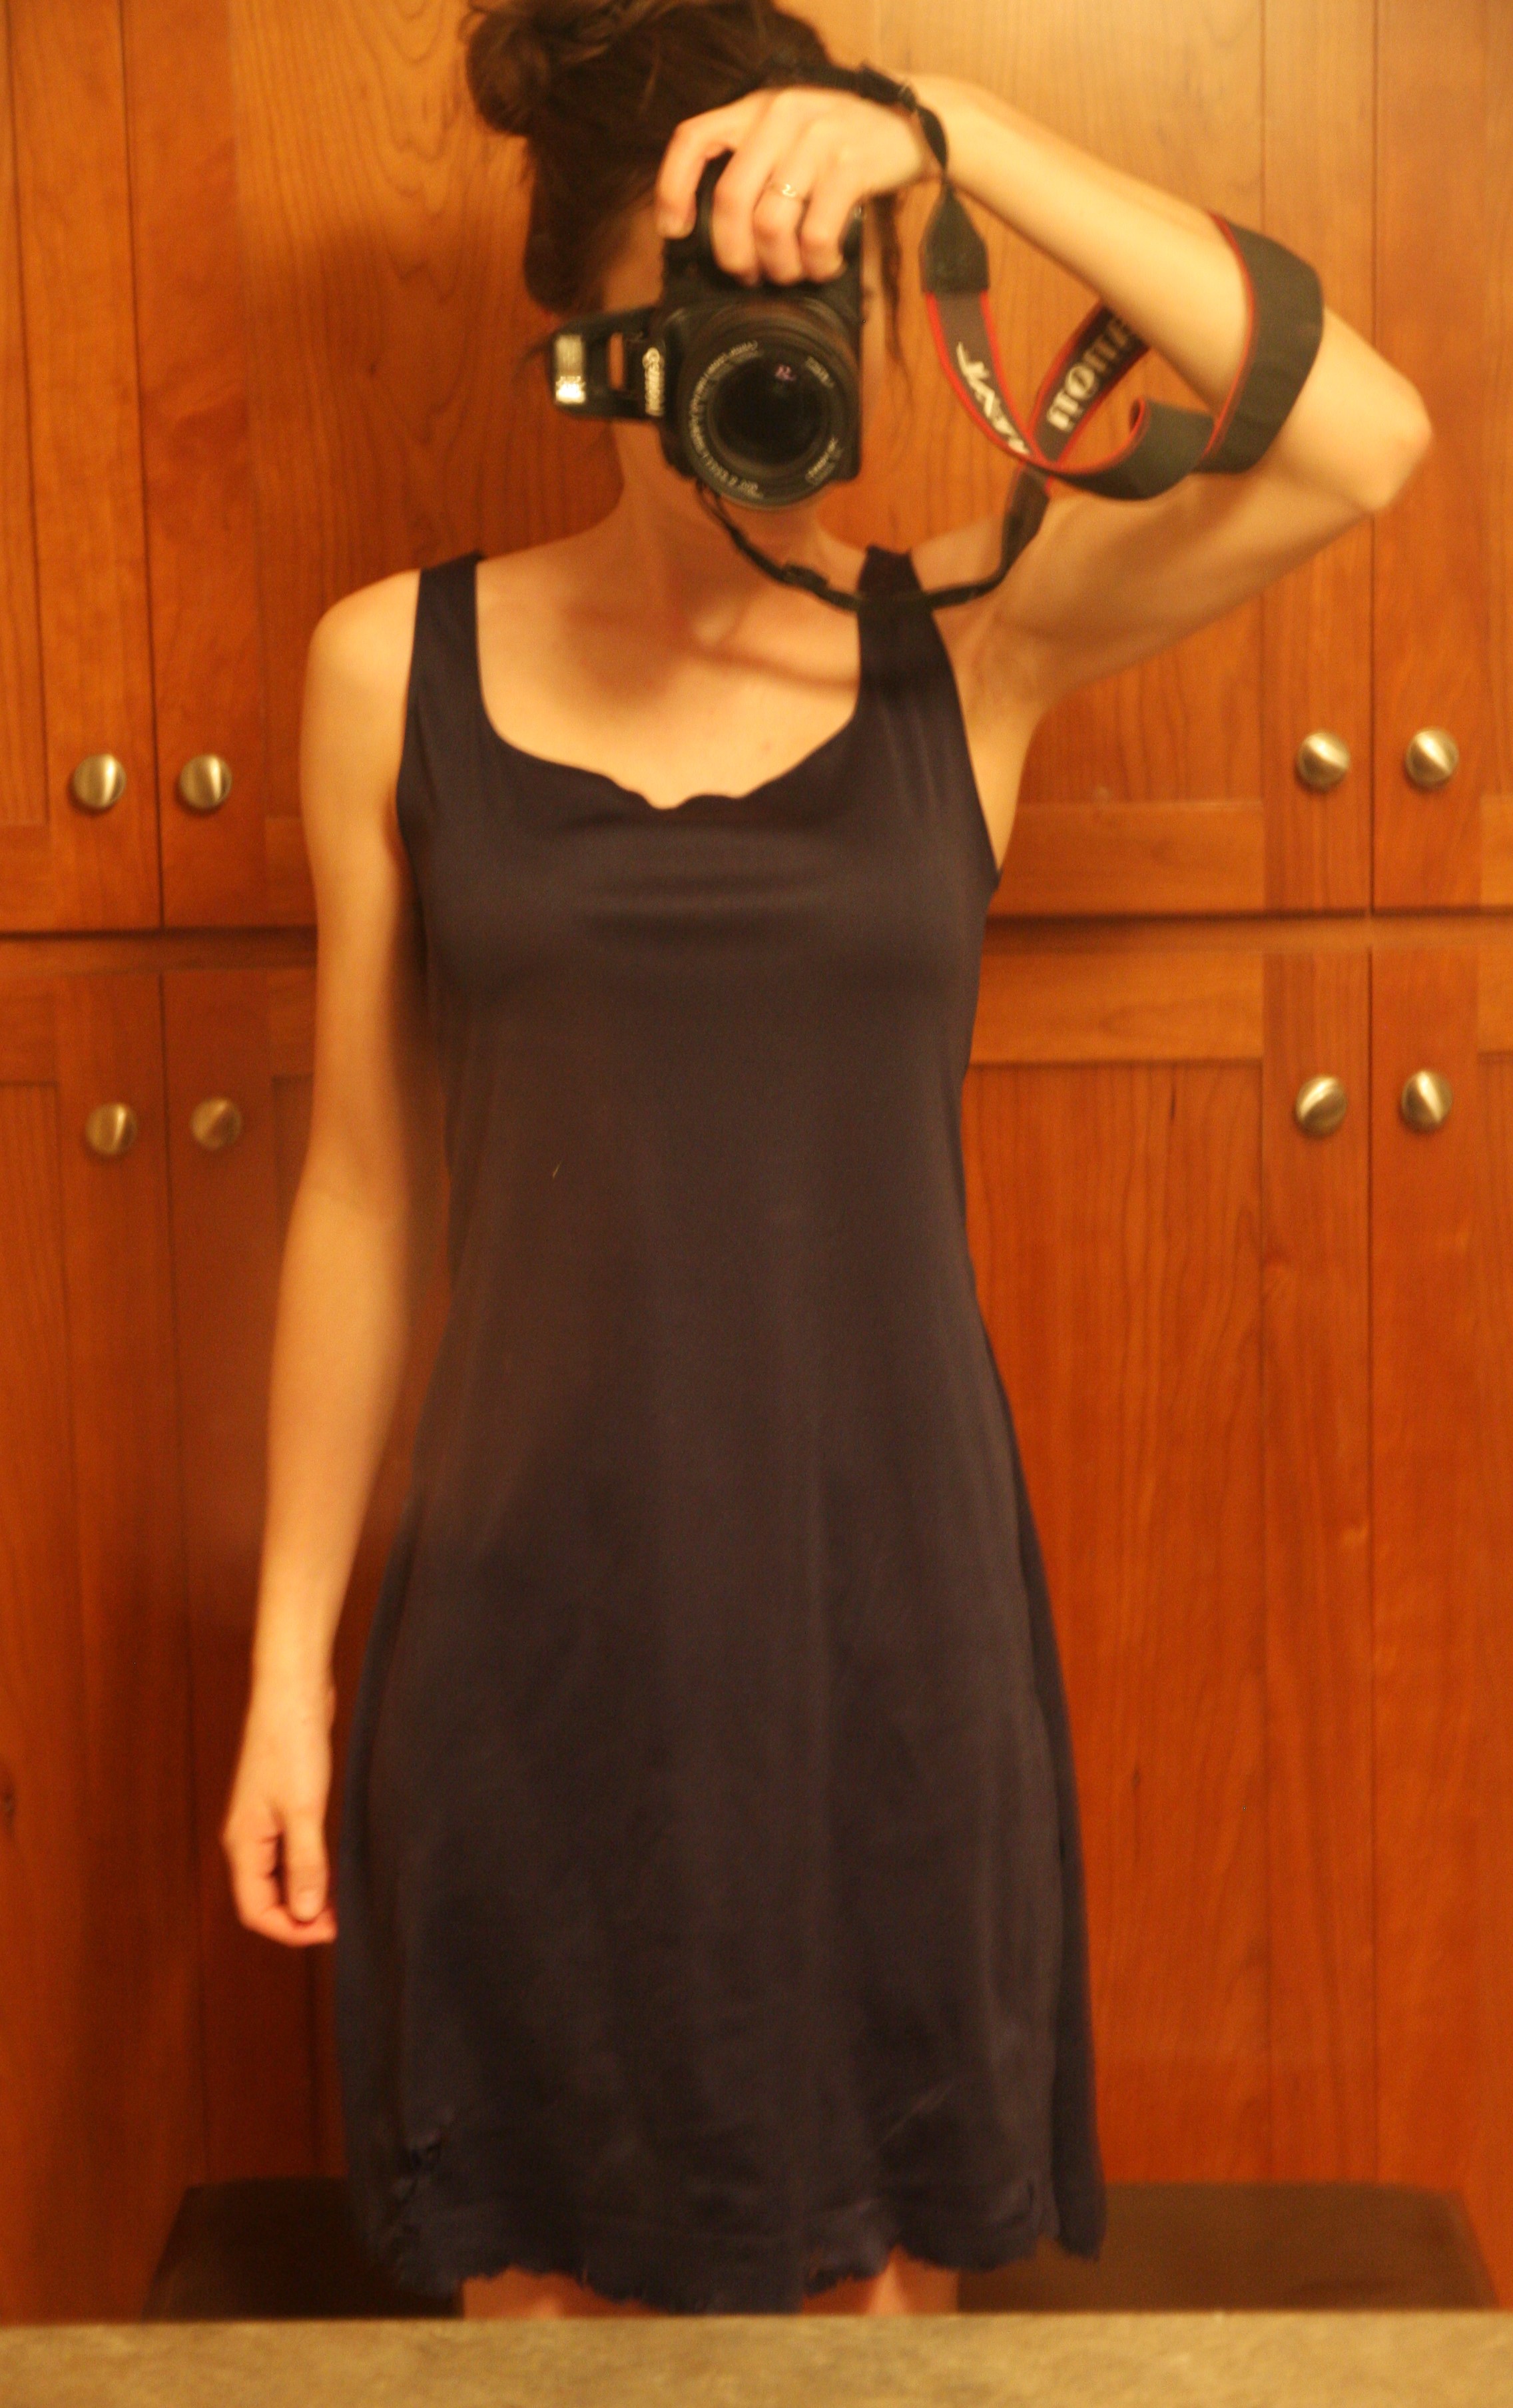
As you see, this fabric still gave some glare in photos, which is why I weathered it. I’ll cover that step in a later segment.
…Trim Trim Trim.
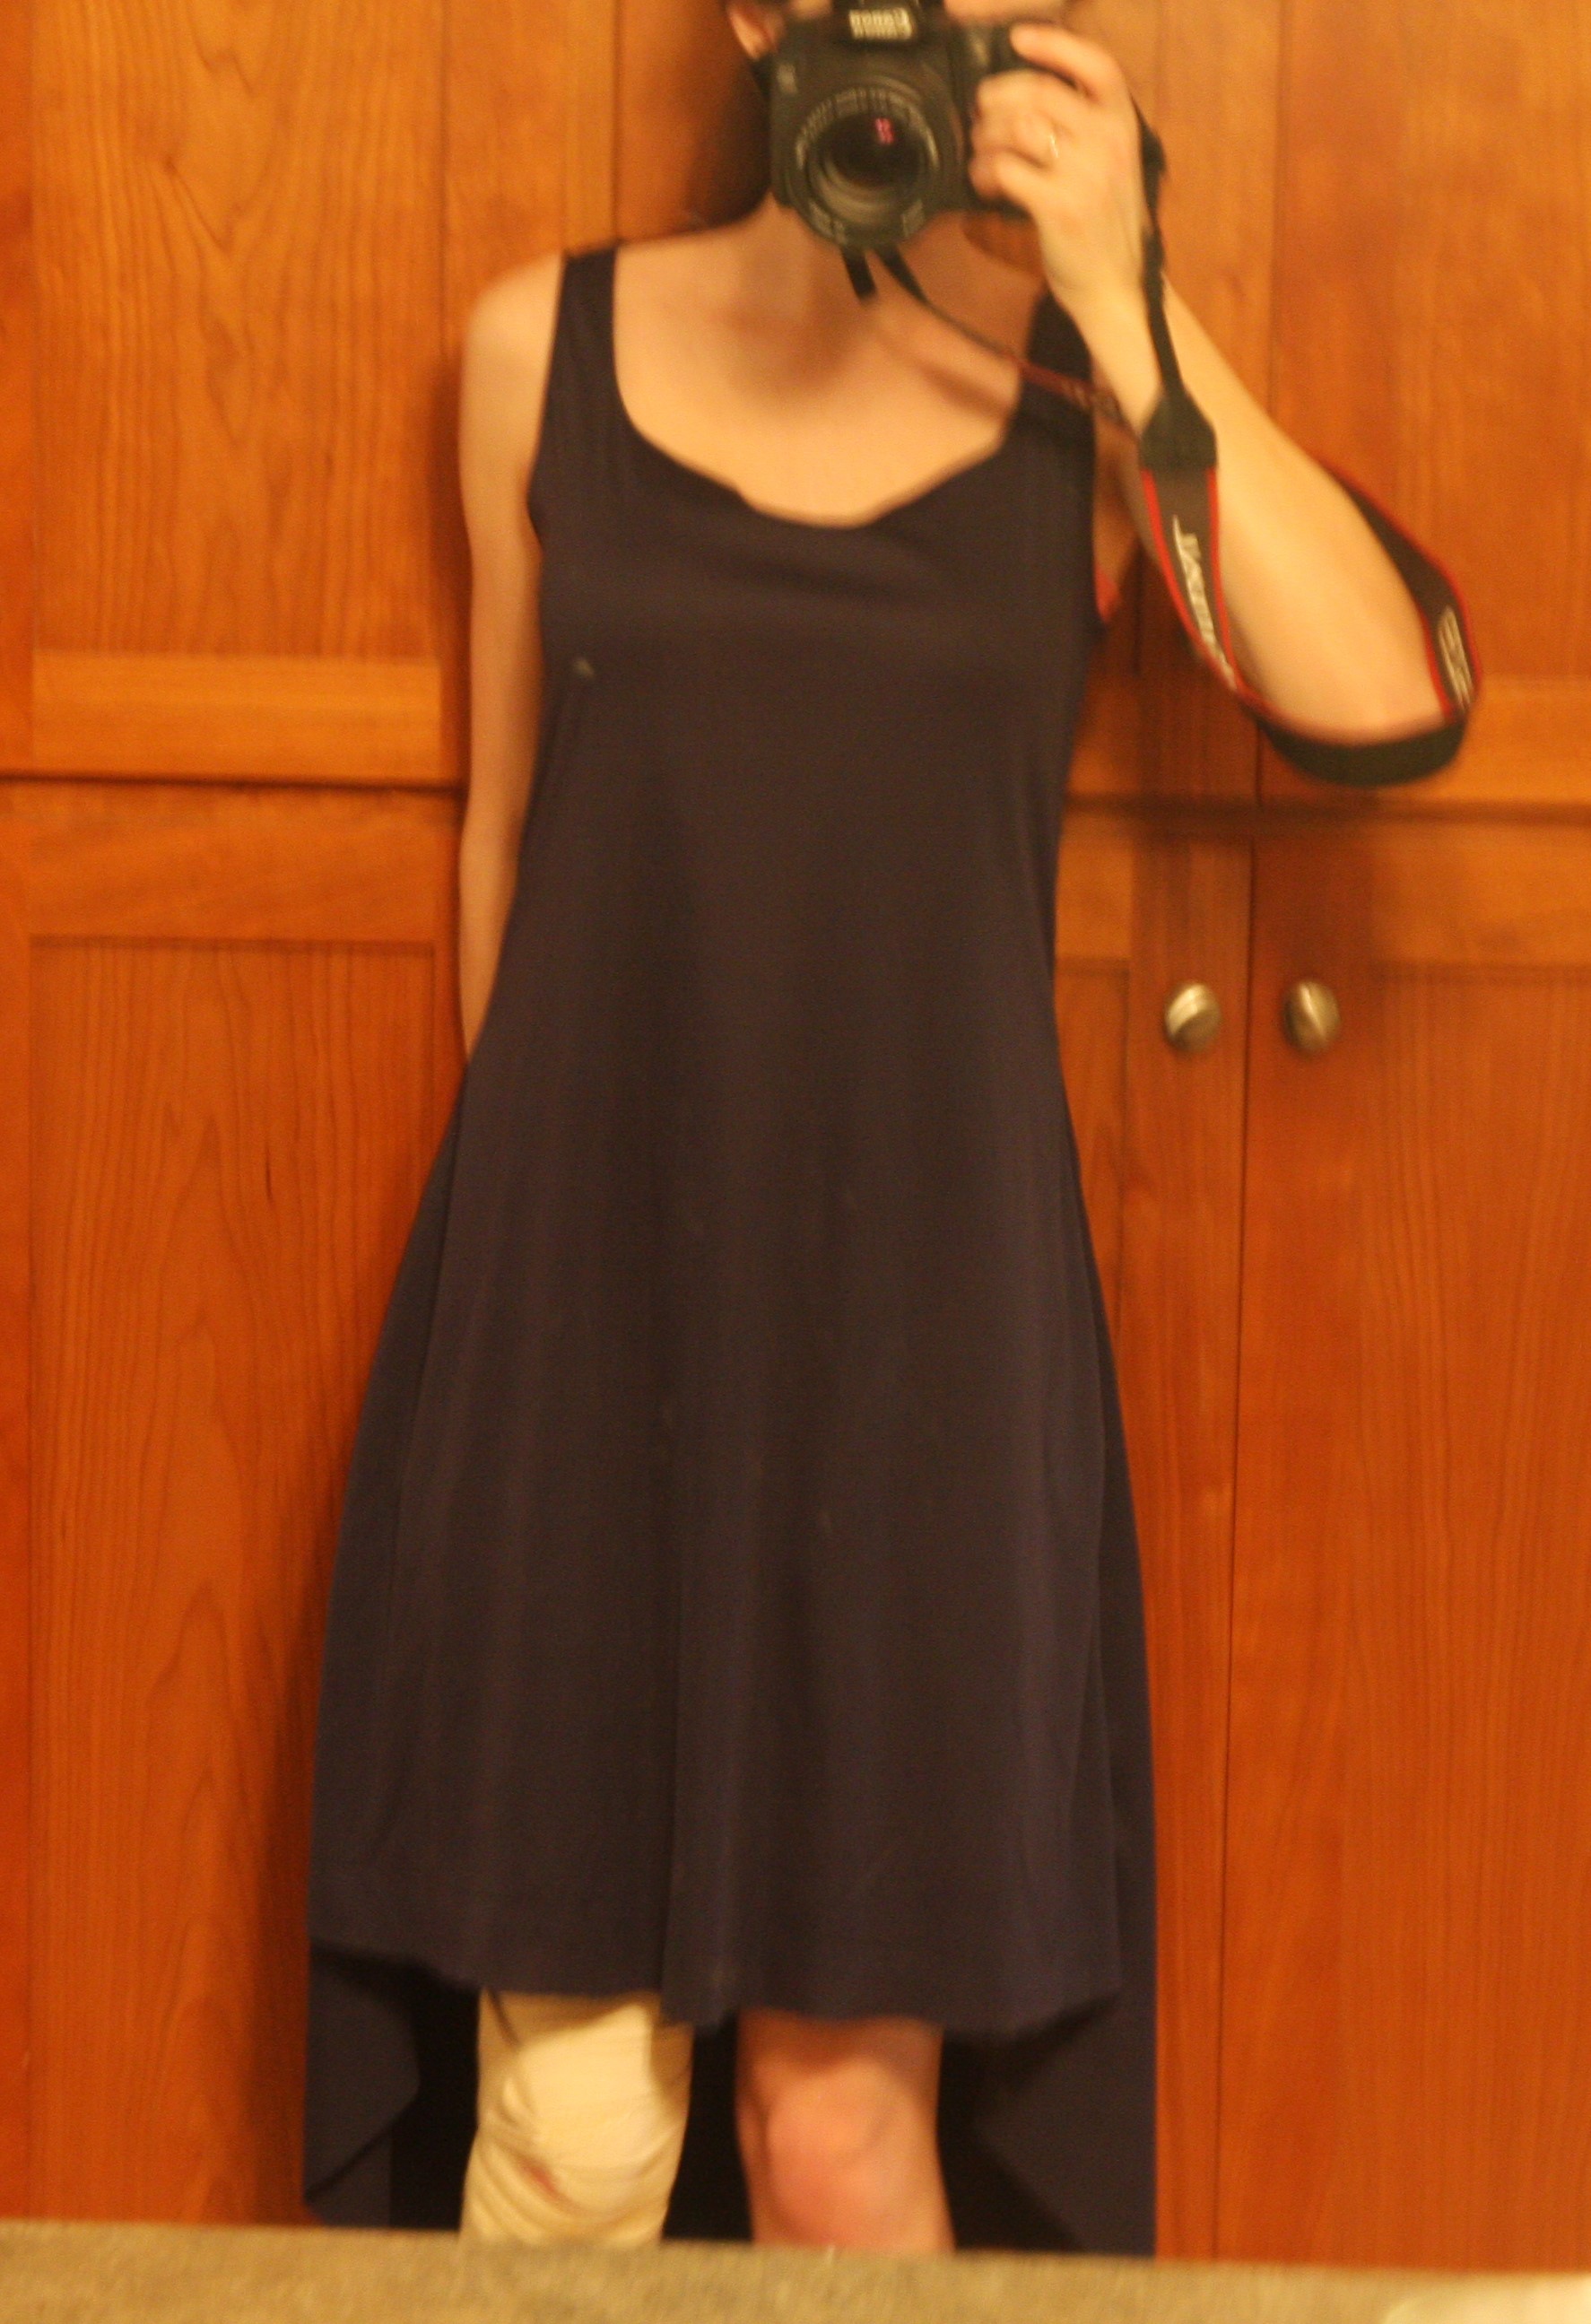
This is after some adjustments to the neckline and arm holes, and after taking the side seams in a few times (see how the mid section still hangs loosely? I was worried the extra, shifting fabric would affect the fit of the apron.) The skirt already had a nice fall to it though. The back hem is long in this photo because I had extra fabric to work with, and was toying with the idea of having part of it a little longer for a more dramatic tearing look. I ended up cutting it almost even with the front.
…You can ignore the Ace bandage on my knee: I had a bad injury to it and my ankle at the time.
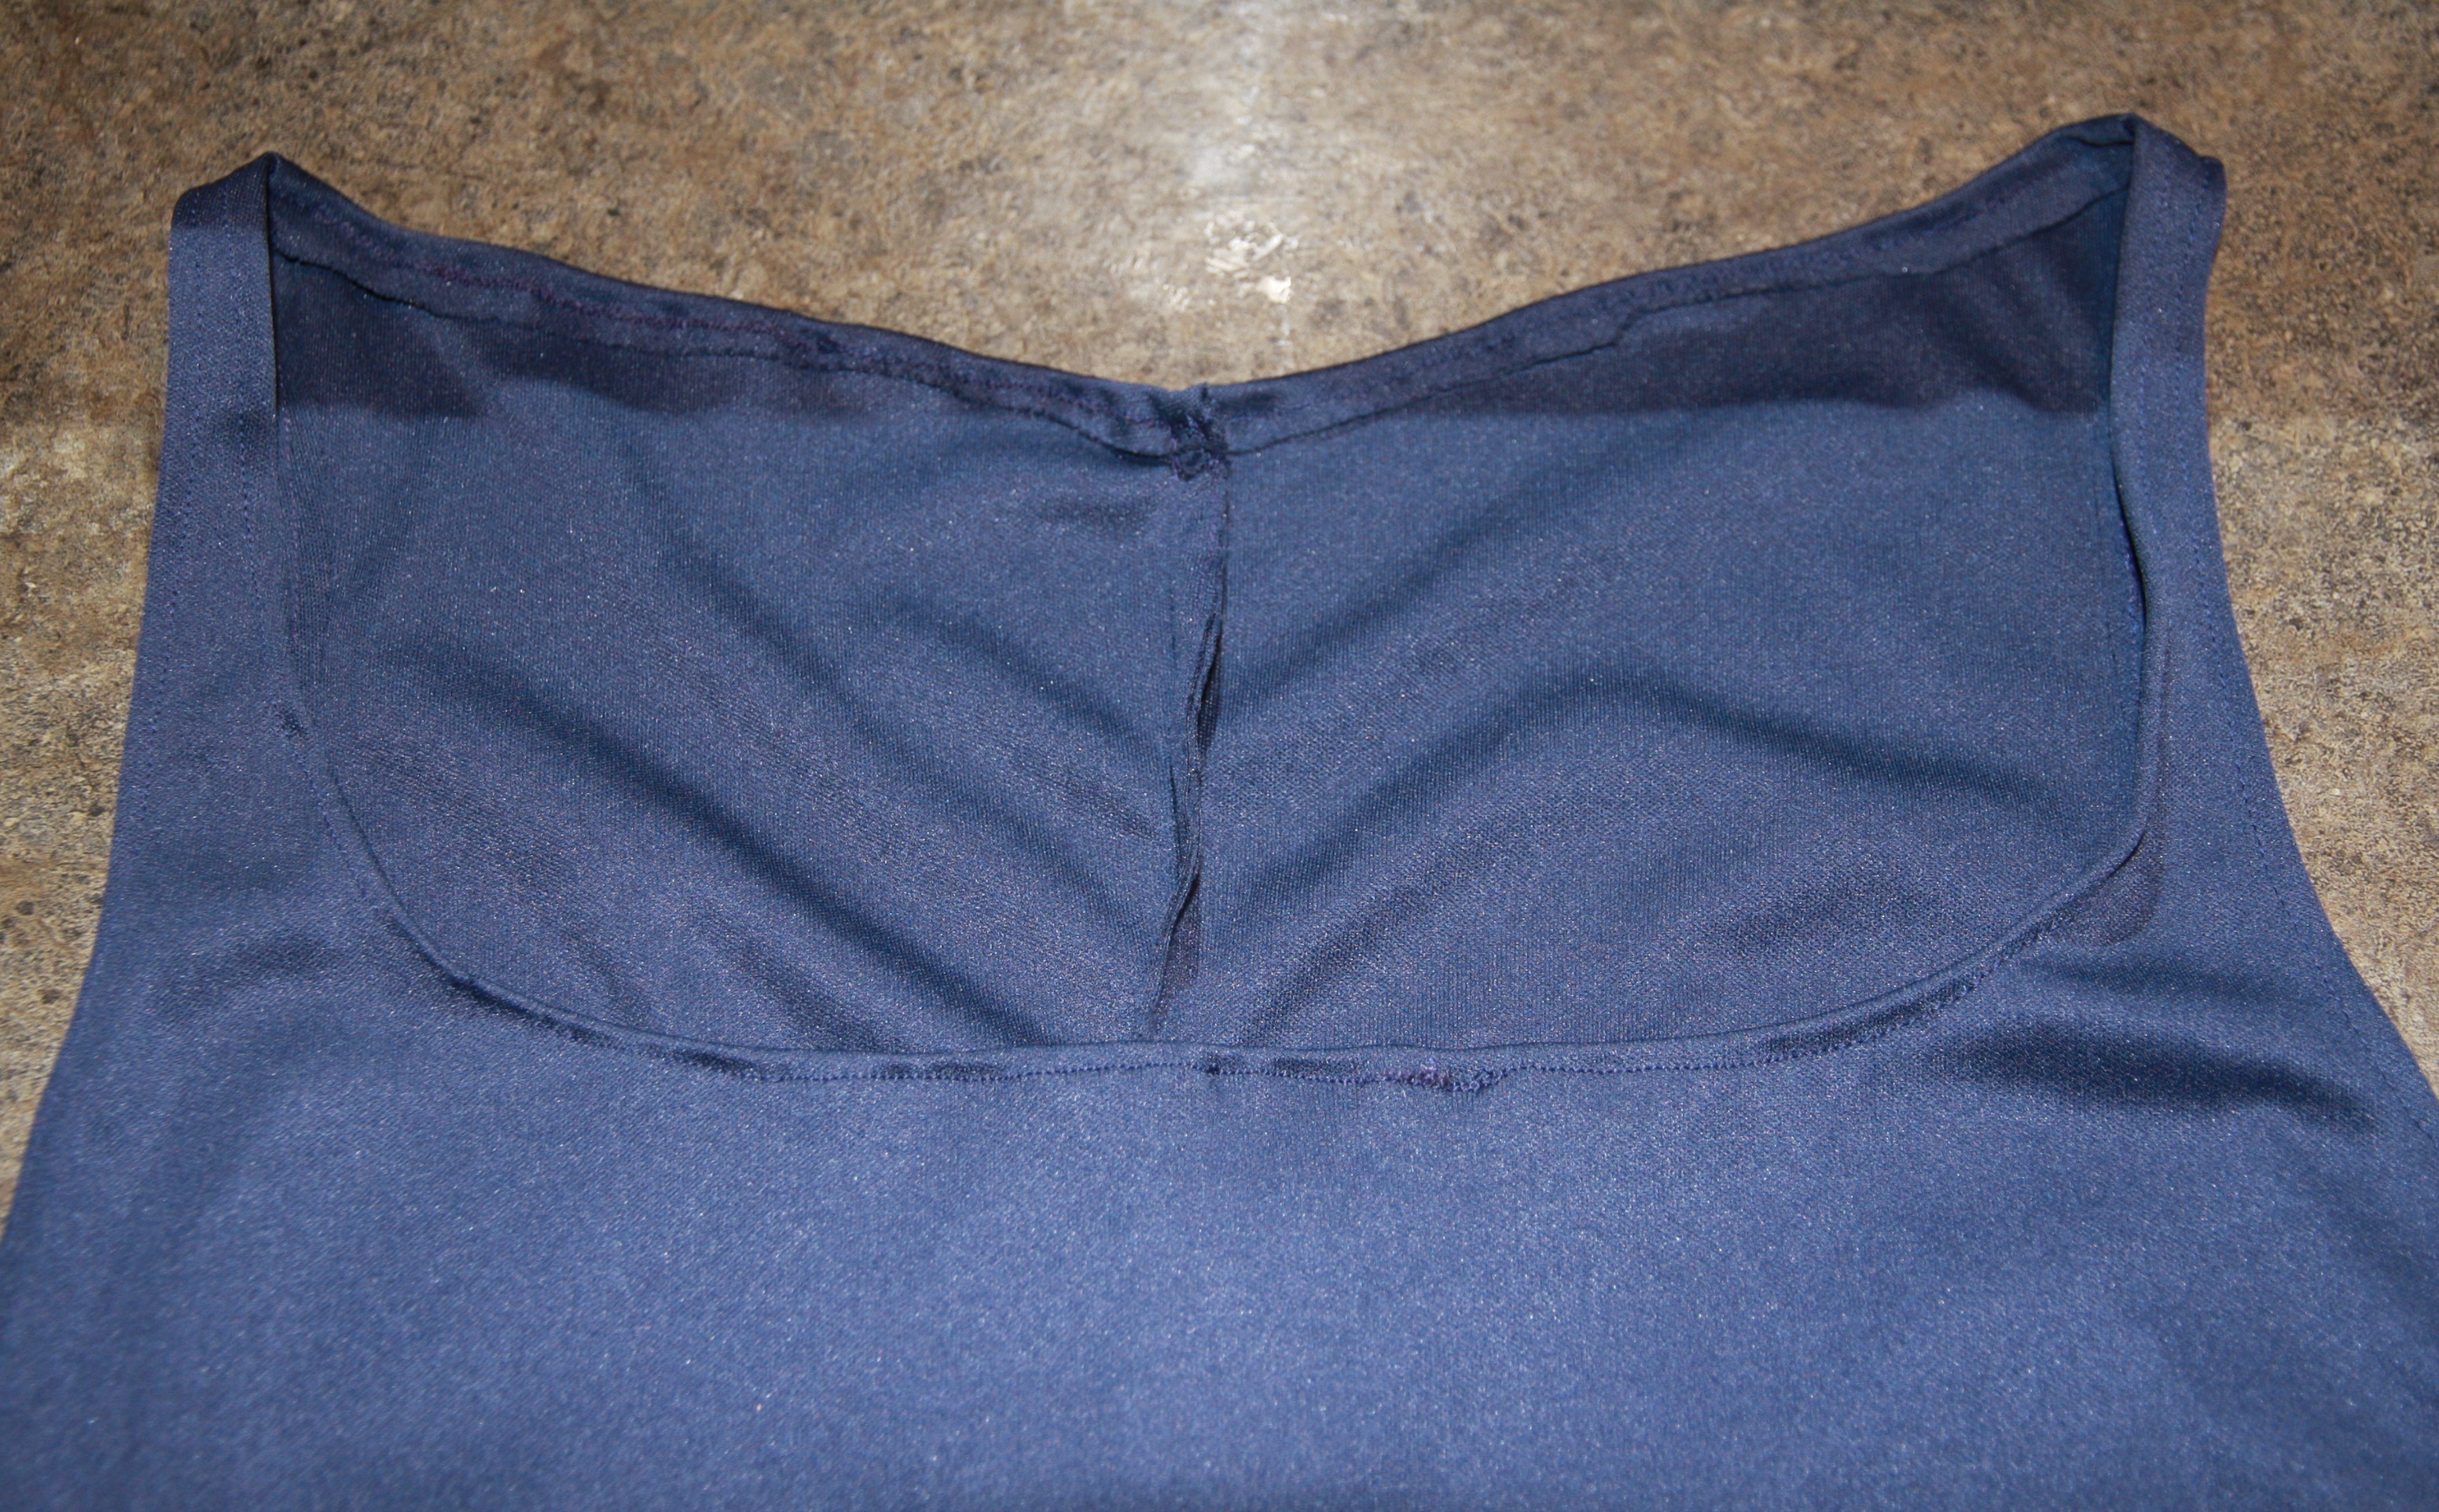
Eventually it went down to this.
The arm holes were a bit of a challenge. Once the other adjustments were done, they were rather tight under my arms. I had to cut away fabric (tiny little pieces at a time! Tip 6: There is nothing worse than cutting too much; you can always cut more, but once you’ve cut too much…there’s no going back.)
This meant even more trying on before final sewing. I’m lucky I don’t have a fear of being pricked by pins.
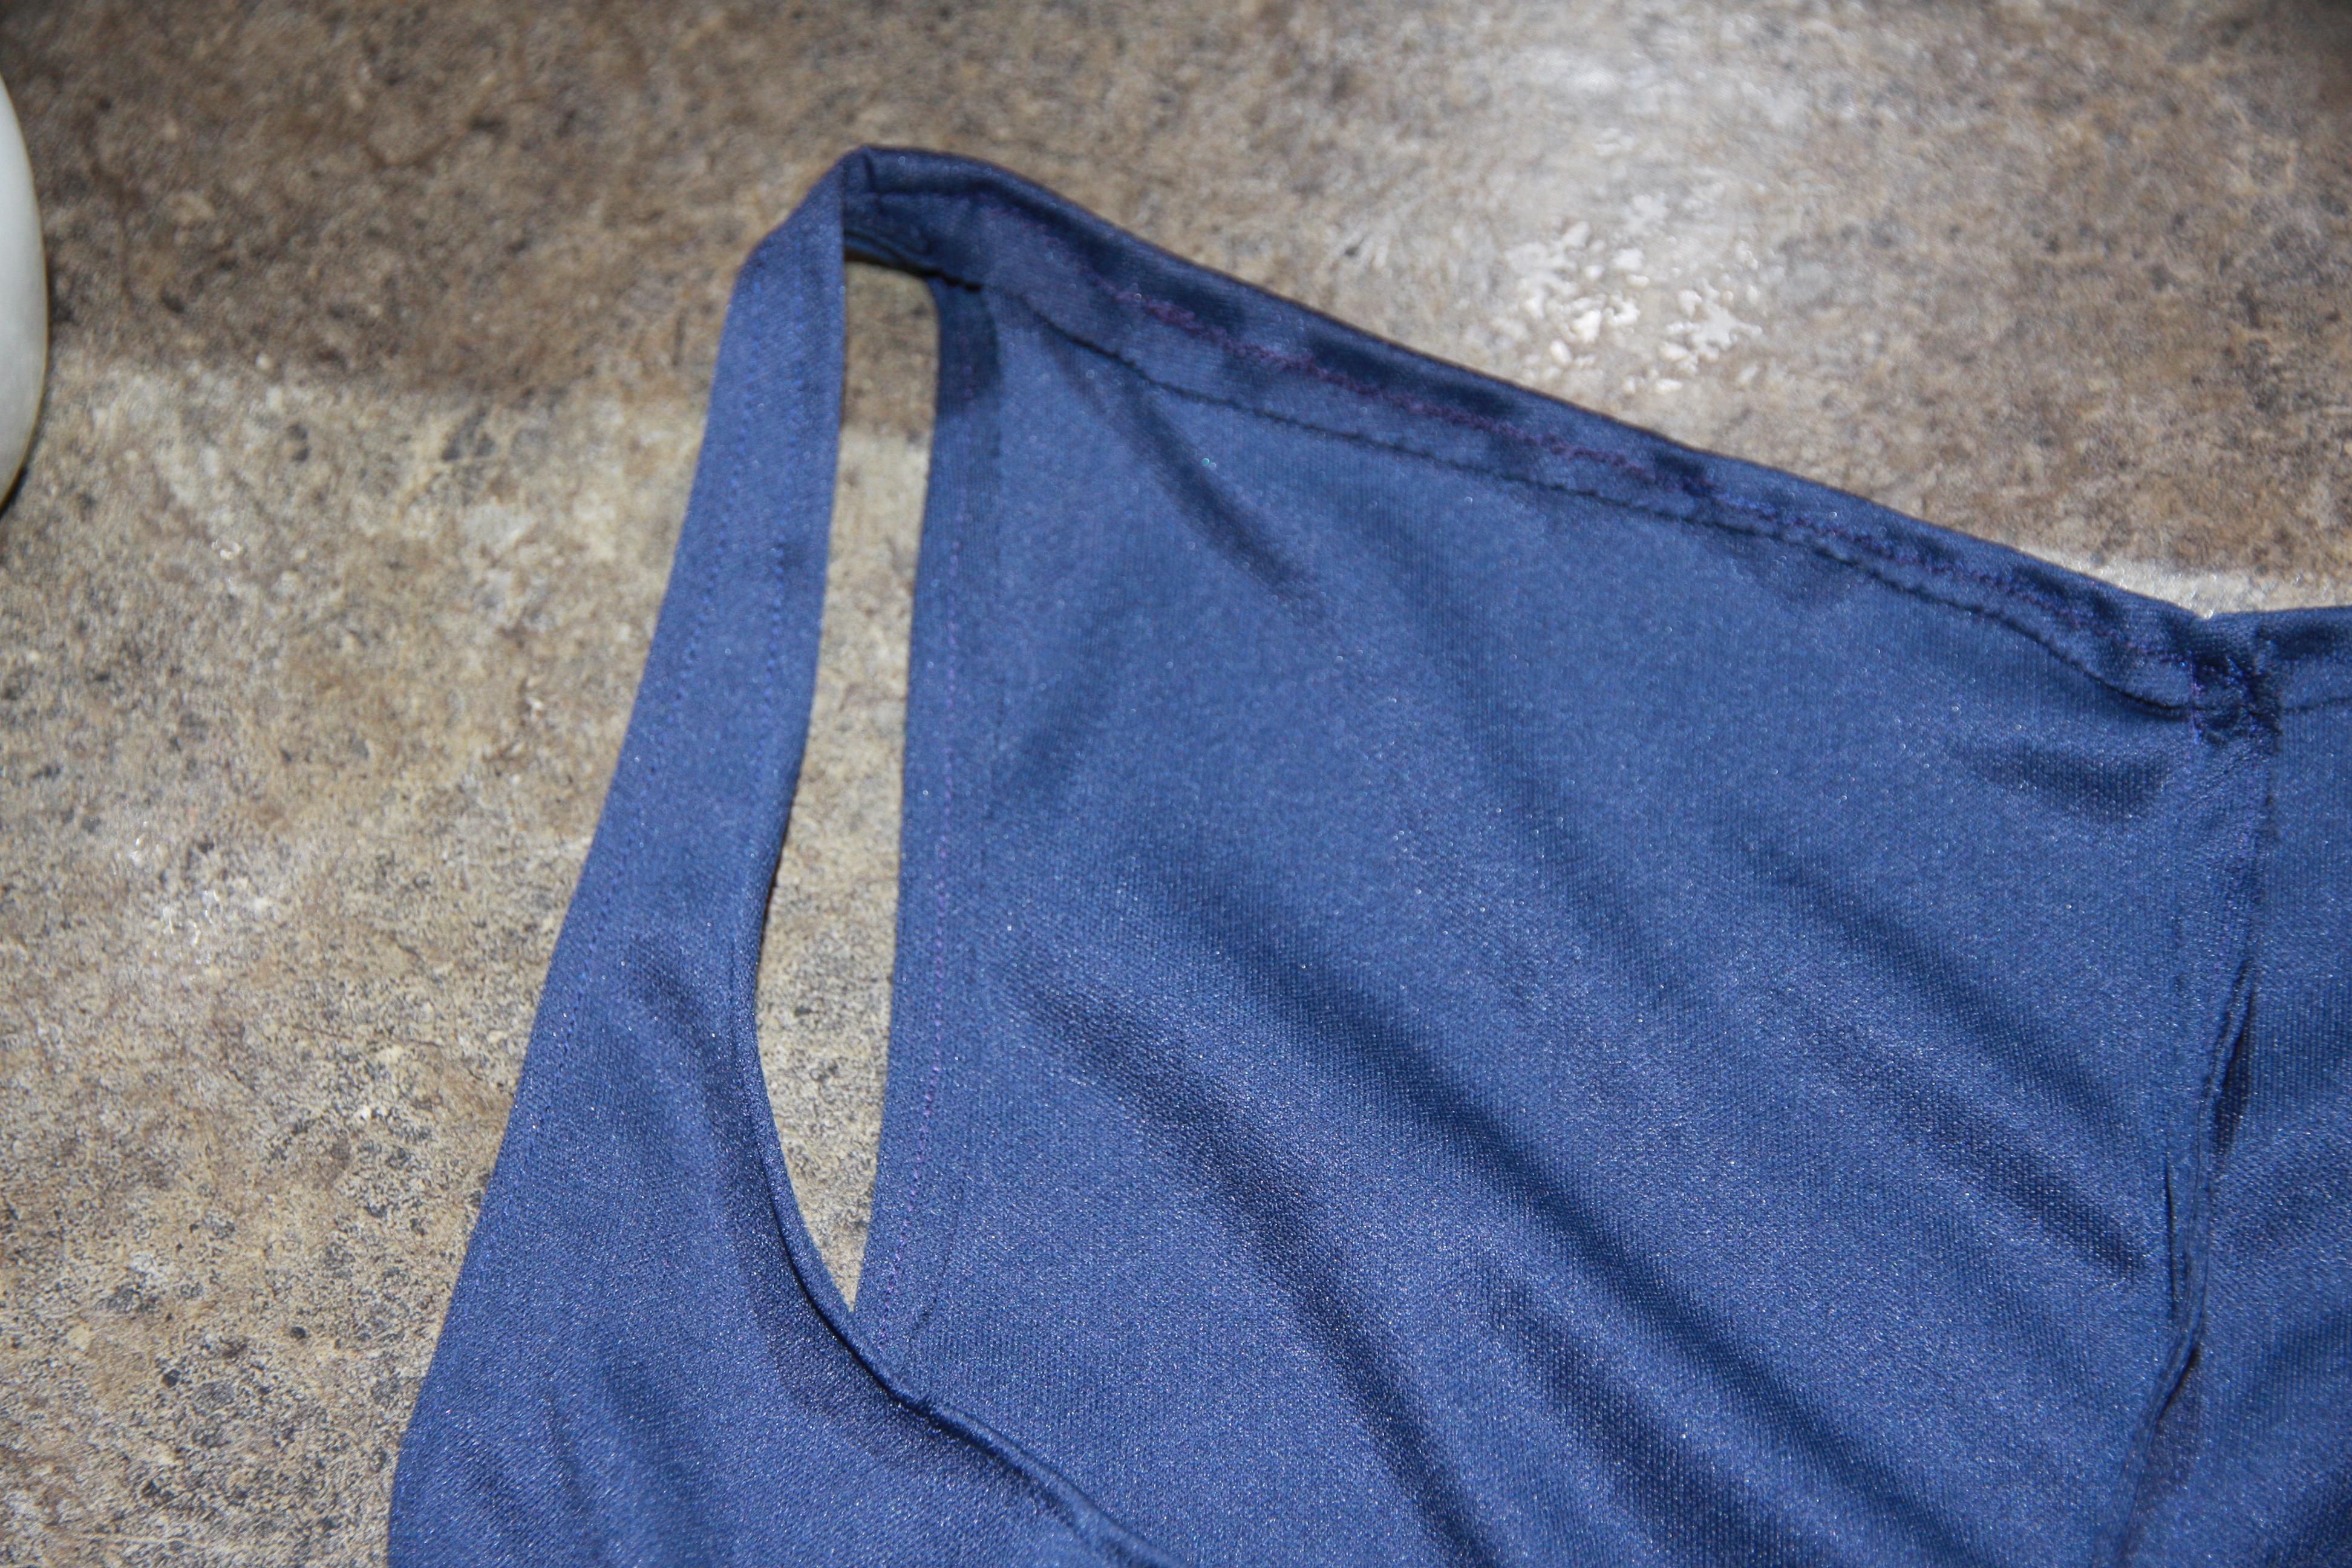
I made the straps very thin so they would be easily concealed behind the apron.
The dress was probably the most stressful element of the costume to create, simply because it took the most work to get it to fit me right.
The most worrisome element was the arm bands, but we’ll get to those later.
The dress when sewing was almost complete. I thinned the straps a little more after this.
You can see that at this point I had already taken a cheese grater to the bottom of the dress. I got a little excited.
Yes, a cheese grater.
We’ll get to that later.
The apron:
I wanted to cut the apron out in a single piece, so I purchased far more fabric than I actually needed. I set out for a minimum of 48″ by 12″, and ended up with a lot more.
For this, I searched out suede and canvas-looking fabric. In still frames of Mononoke, her apron usually looks like it’s made of hide with short white fur on it. I thought making it out of white faux fur would look silly. Thus the option of suede.
I chose several bolts of fabric in the store in varying shades of white and tan, suede, canvas-like, and cotton. I felt their texture, took photos to see how they showed up in different lights on camera, and looked at photos of Mononoke on my phone to compare.
What I wanted:
- Fabric that would not glare in photos. This made me wary of stark white.
- Something that looked like fabric Mononoke would actually have available to her. So something rougher.
- Let’s face it, our lovely Mononoke spends her days in the woods. Even when she didn’t have to fight people, she would get dirty. Over time her clothes would become stained and darken…and white isn’t very realistic in person anyway, though it looks fabulous on animated Mononoke. ;)
In person, I really liked the look of a cream suede. In photos, it glared badly. I debated if I could weather it enough to cut the glare, but based on the kind of fabric and the backing it was on, I thought I was more likely to destroy it. In a bad way, not a weathered way. And the suede was significantly more expensive than the canvas look-alike.
My final decision was the tan canvas (really thick, stiff cotton, basically). I’m definitely glad I chose it. Not only did it weather beautifully, but I think it looks great with the rest of the outfit. And it was much cheaper!
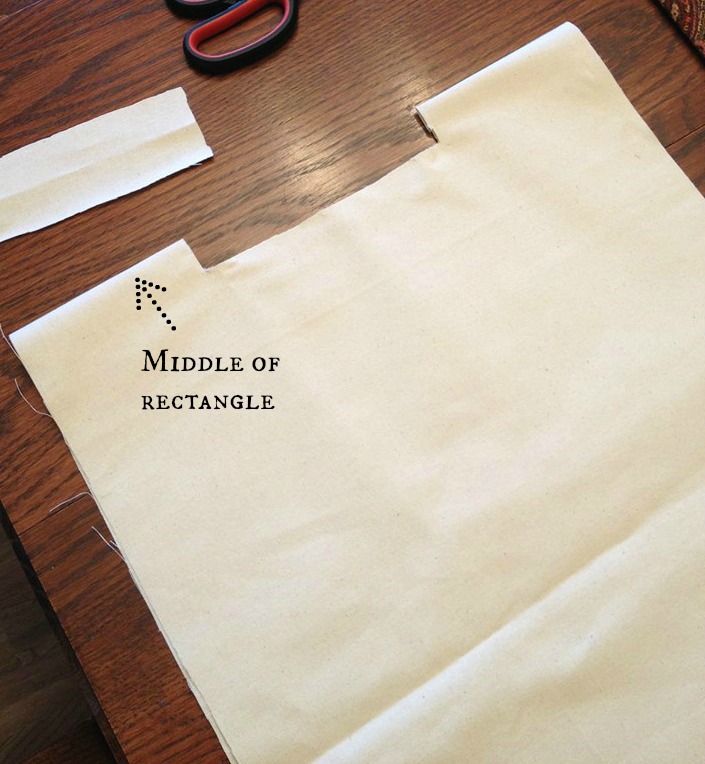
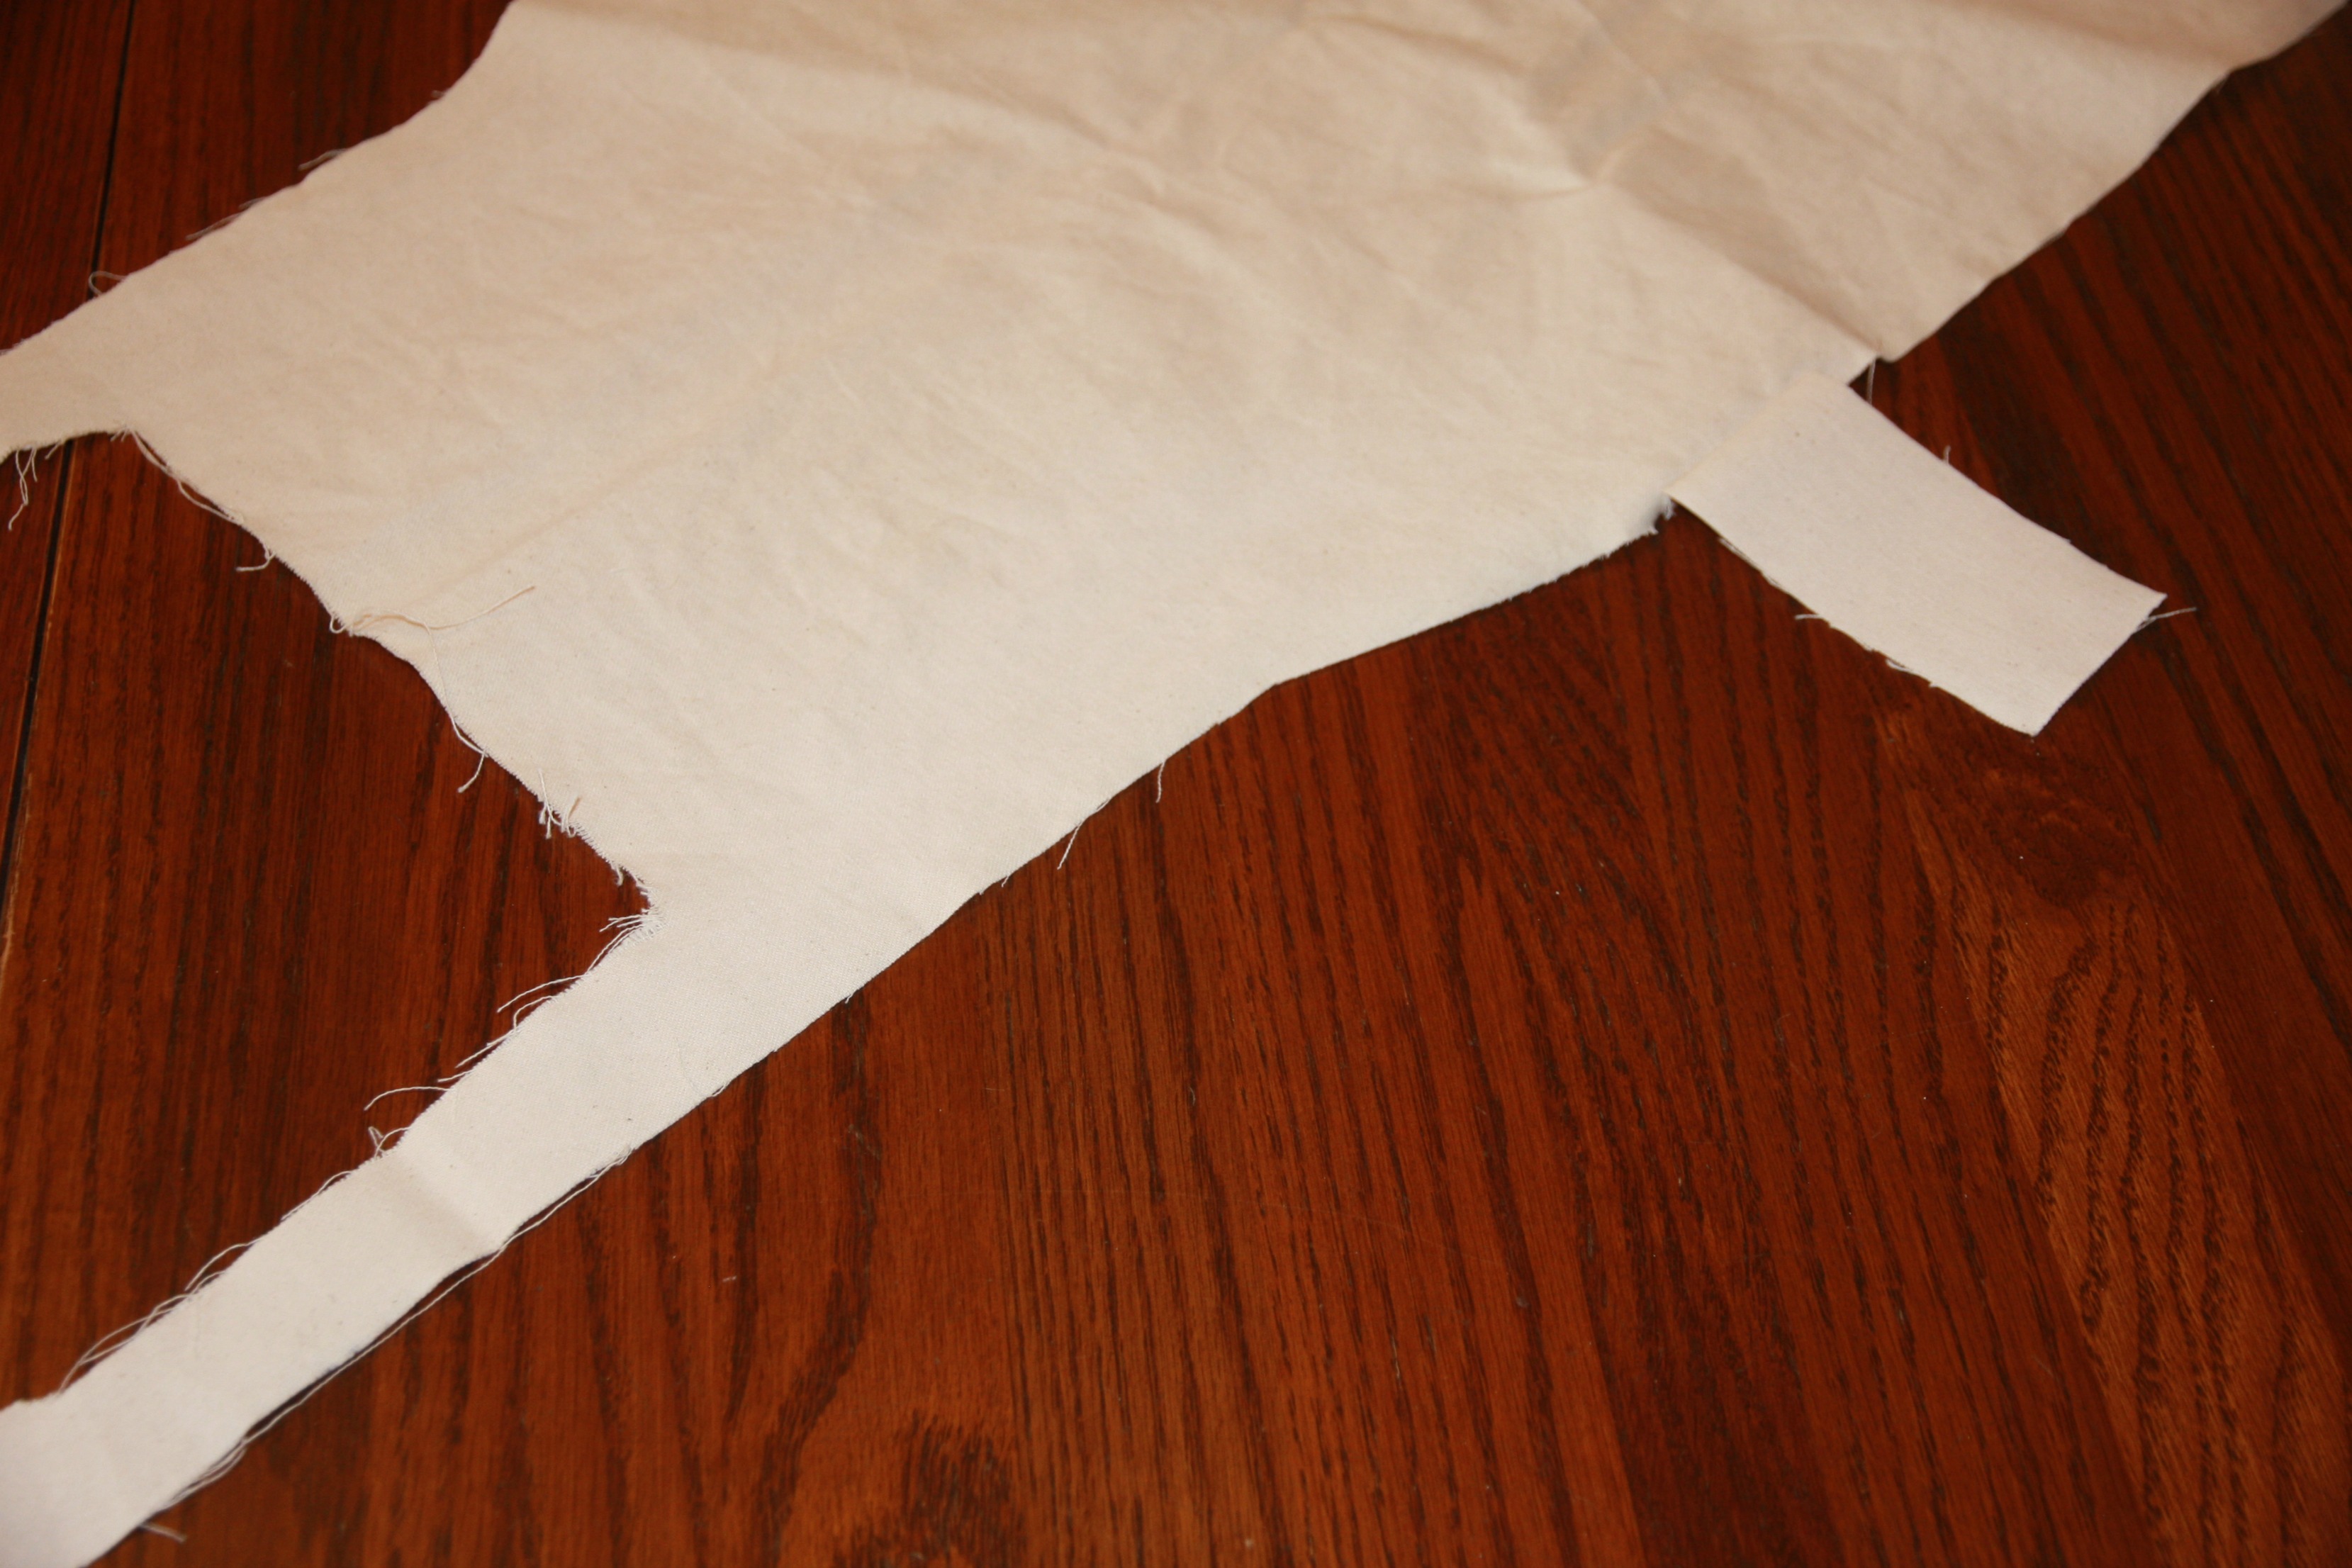
Step 1: I measured the length and width I wanted the apron to be, gave myself a few extra inches to work with, and cut out a long, thin rectangle roughly 48″ by 14″.
Step 2: I folded the rectangle in half and cut out the beginning of my neck hole. I started small. While the front was cut down, the back remained very shallow to help keep the apron from shifting too far forward.
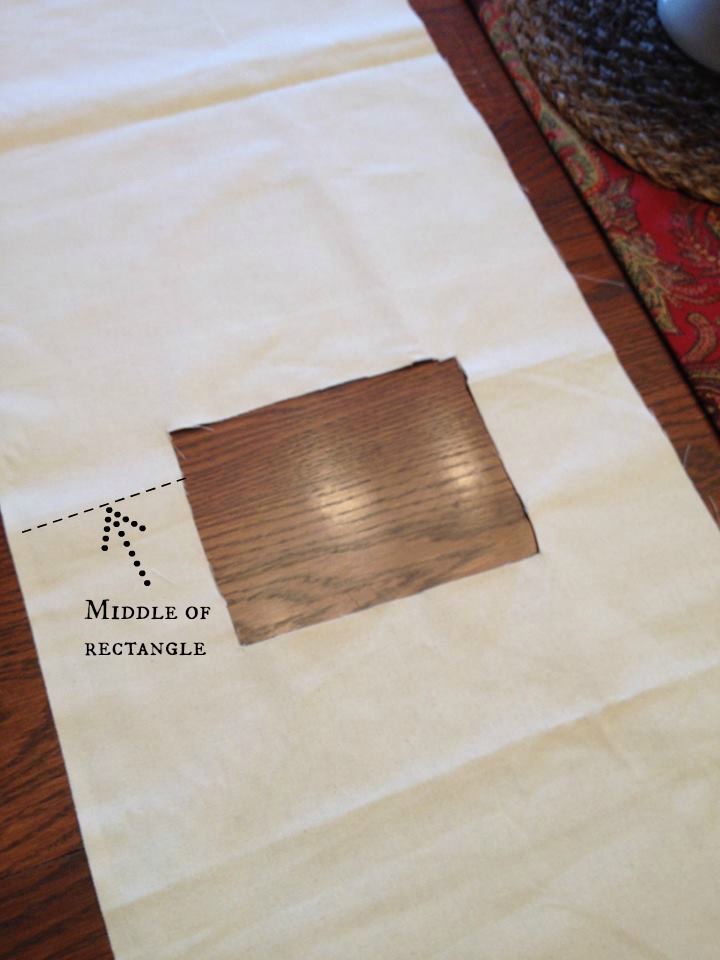
I carefully cut the hole large enough to fit over my head, so I could see how it fell on me before proceeding.
Step 3: Wearing the apron, I bobby pinned where I wanted the neckline to be. Then I cut it out.
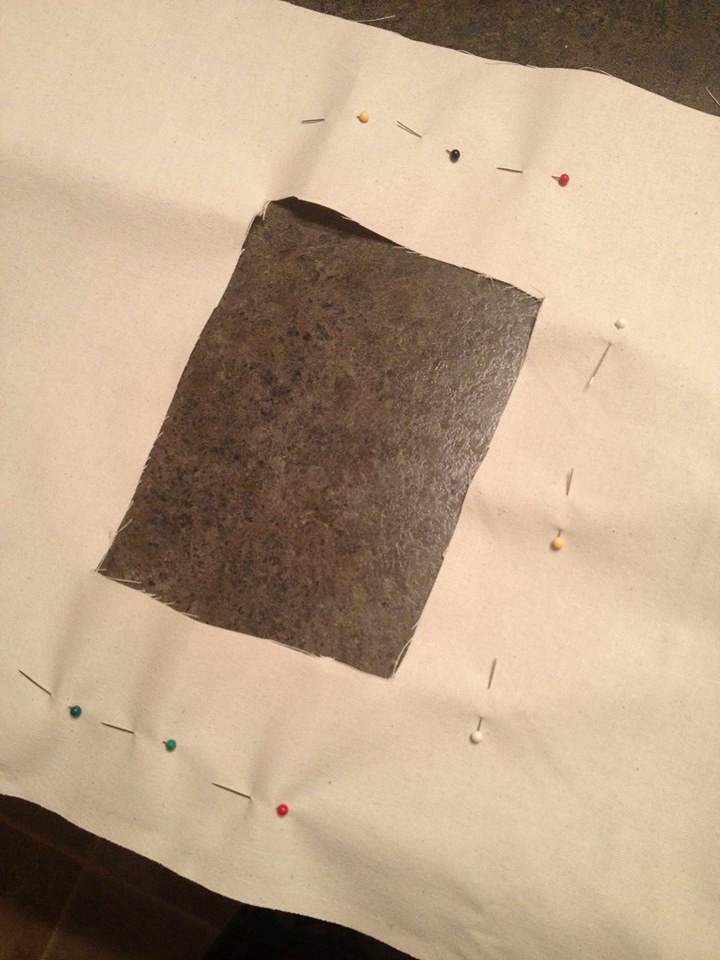
Step 4: I didn’t know how the apron would fit once the neck hole was done, so I didn’t add the tabs until later. This is the only part of the apron that was sewn. I attached the tabs to the front side, lower than an empire waist would sit, because it does pull up slightly once it attaches to the back side.
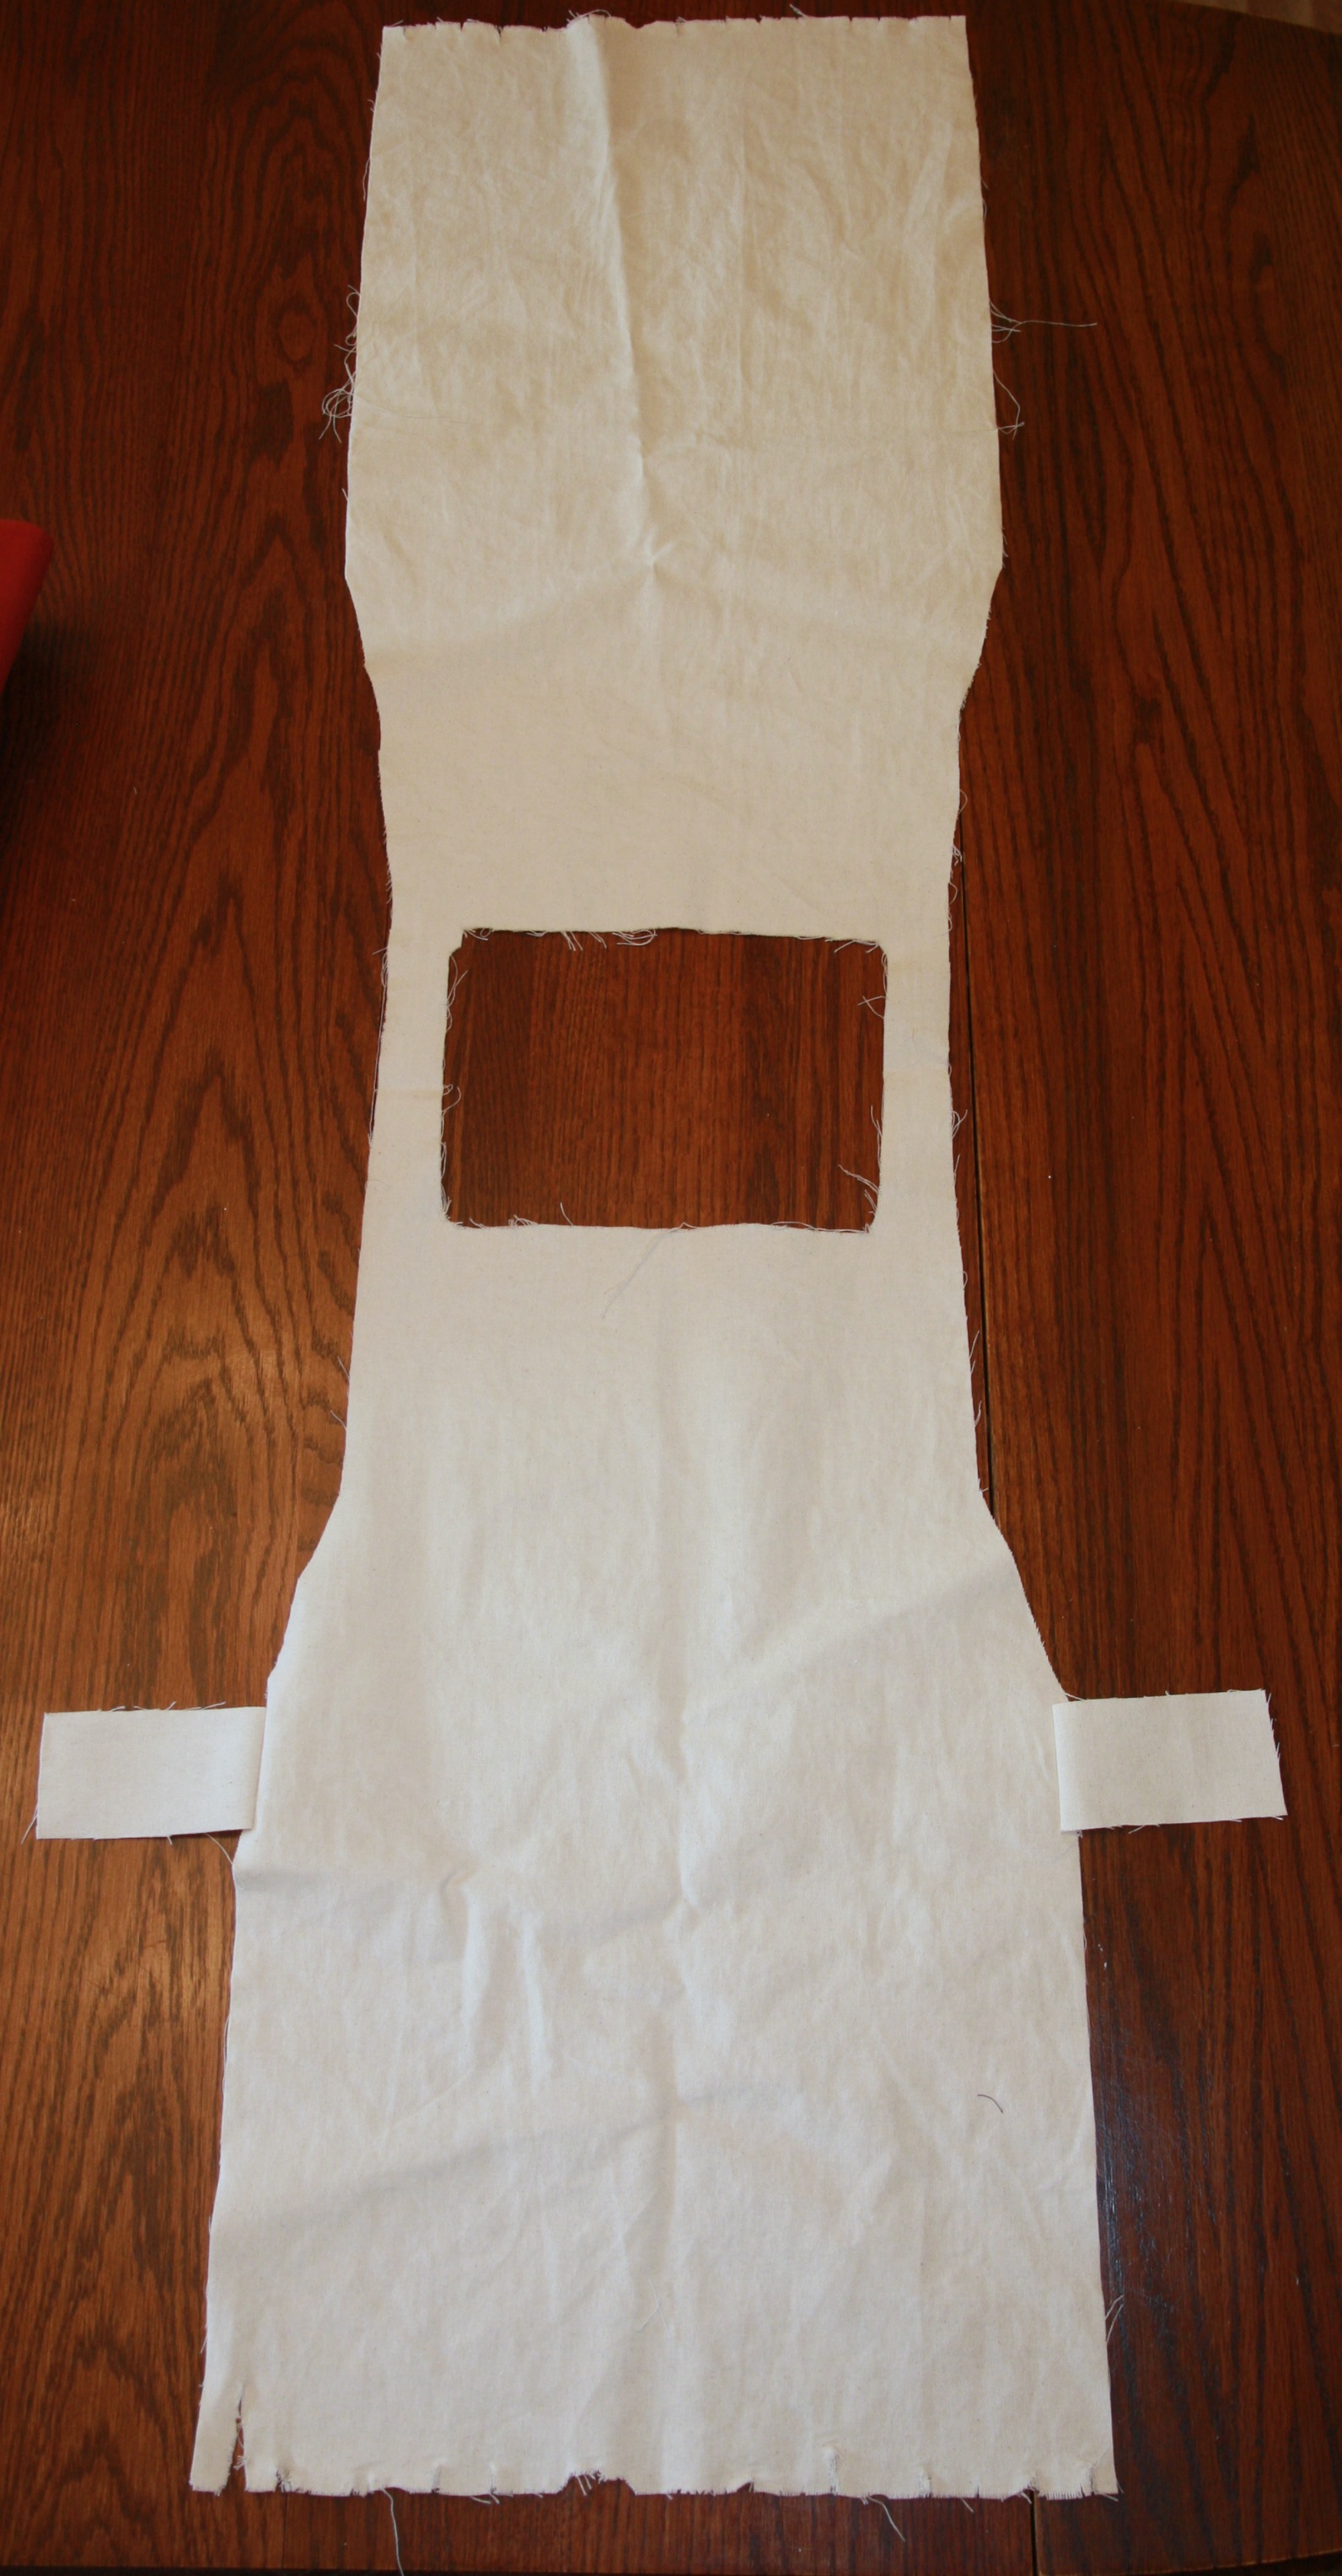
Step 5: I cut an angle starting at the top of the tabs, moving in toward the neckline before straightening the cut to the other end of the hole. Then I angled it out again. This gave me thinner straps without having them placed too far out on my shoulders or taking away width from the torso sections.
This also made the shape of the apron closer to Mononoke’s. If you look at photos, there is a slight angle on hers as well.
You can see that I’d already started roughing up the bottom “hems” at this point…I got excited again.
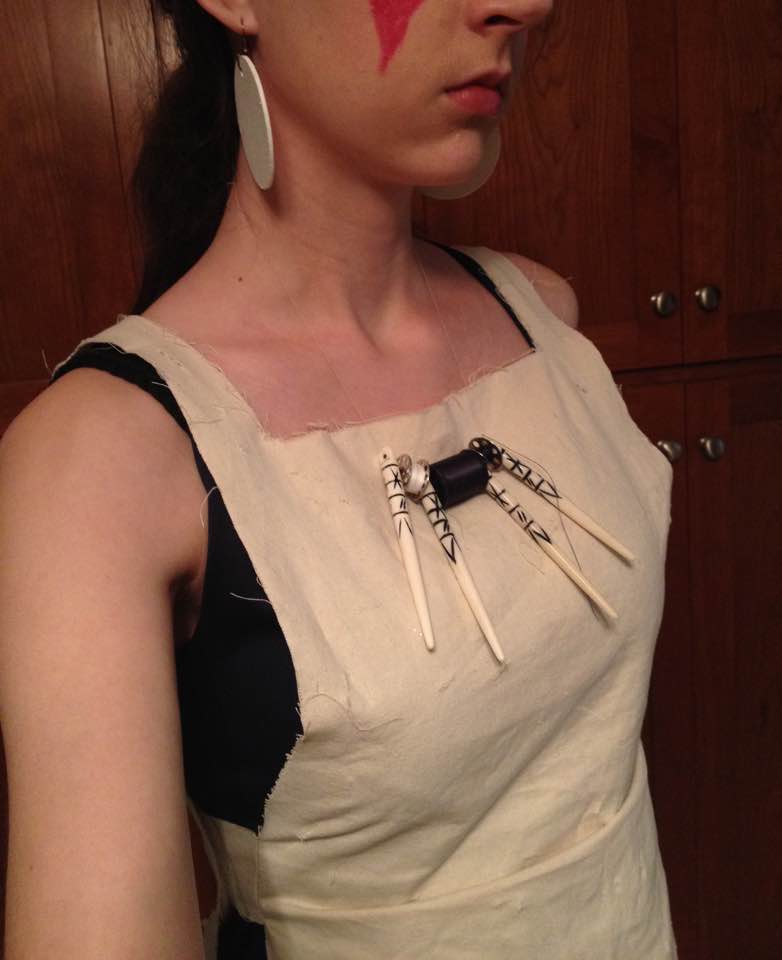
This is the apron after cutting and with the tabs attached. I actually trimmed the neckline lower after this photo was taken. When I compared it to Princess Mononoke’s photos, I felt like mine rode a little too high.
It still looks basic here. And clean. But that’s where weathering comes in. ;)
(This gives you a sneak peak of the earrings, beads separated by thread spools, and lipstick on my cheeks as face paint…we’ve already established that I get excited. Haha!)
Well, that’s all for this post. (The weathering will be covered separately) See you in the next segment!
Also in this series:
The Base: Mononoke’s Dress and Apron
The Accessories: Mononoke’s Headband, Armbands, Necklace, Earrings, and Face Paint
Mononoke Wrap Up: Final Weathering and Other Extras
Photos of Mononoke
If there is anything in particular you would like added in to these posts, let me know!
Just B. Jordan is an award-winning author of fantasy and sci-fi. She graduated high school a year early and received her first publishing contract at the age of 18. To Ashes We Run is her most recent novel. Find it here.
Leave a Reply